Sunday, June 12, 2016

How to Create an Animated Color Wheel: High School Art Lesson Plan

This year, I decided to try something a little new (and very challenging!) in my freshman Intro to Design class. Since our art department doesn't currently offer a motion graphics class, I added a basic animation project  - an Animated Color Wheel - to my curriculum. The combination of new concepts such as timing and key frames, plus two new programs (Illustrator and Photoshop) was overwhelming for students at times, but it was heartening to see that many who struggled with drawing and painting really succeeded at working digitally! 

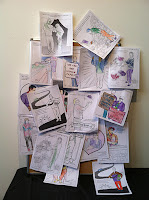
Here are a few samples of their work:

The great thing about this project is that the you don’t need a lot of skill with the pen tool to create a shape that will look interesting once it is rotated and copied to form the color wheel. This provides a really nice opportunity for success without a whole lot of knowledge. The kids were always like, “WOW, THAT’S SO COOL!” after the wheel was complete. I can't claim authorship of the basic color wheel project, however. When I was a long-term sub, the teacher I was covering on maternity leave shared the project with me. It was a really wonderful idea, and I'm so thankful for her creativity and generosity!

Overall, I think the animation process was a success. Although it was not the most creative project, the primary goal was for students to understand the concept of keyframes and how basic animation worked. Many of the students simply followed the step-by-step instructions, as I did not grade this project based on creativity (see rubric below). All I was really looking for was the basic requirements of opacity change, scale, rotation, and text. That said, many of the students were quite creative and went above and beyond the requirements to create some pretty interesting works of art!

Intro
To introduce the unit, I had my students draw color wheels in their sketchbook and we reviewed some basic color theory. I also spent some time with them going over the fundamentals of using the pen tool in Illustrator. Here is a great tutorial if you need to brush up on some basics.

Step-by-step instructions:


I would definitely practice this a few times on your own so that you can figure out where the students are most likely to make mistakes – because you will have made them too! If the written instructions are too confusing, here is the video tutorial:


Grading rubric:


Common mistakes: incorrect aspect ratio, which made it difficult to compile all their final videos; forgetting to convert a layer to a smart object; confusing seconds and frames; extra time at the end of the video. Lastly, make SURE they watch their video before they submit so that they can catch any errors that they made! 

Let me know if you have any questions!

Tuesday, April 12, 2016

The Enchanted Woods at Winterthur: Painting with Nostalgia

The Enchanted Woods, oil, 5"x7"
I often find myself more interested in the story behind a painting than the painting itself. When asked about a piece, I tend to launch into an account of the people and places in the image, rather than the specific techniques involved. I love to capture beauty in paint, but I also love to capture the spirit or feeling of that particular moment! So, let me tell you about the story behind this painting of the Enchanted Woods at Winterthur in Wilmington, Delaware.

I’ve only been to Winterthur twice but both visits occurred during pivotal points in my life. Once as I was preparing to leave Delaware for good (or so I thought) and once right after moving back to Delaware (for good – or so I think!). While the entire estate is gorgeous, no one will be surprised that, of course, my favorite hidden gem was the Enchanted Woods. Obviously I like the area designed for children (and the young at heart!) the best.

The first time I went there was the summer after graduating from college, right before moving to Hawaii (I know – Delaware to Hawaii is quite a change, right?!). My college boyfriend and I had already broken up right after graduation, but somehow he ended up in Delaware for a week in July. Ahh, prolonging the agony of a breakup. We all do it, or at least, those of us who don’t have an iron will. But I digress. I was frantically trying to come up with things to do that would entertain my now ex-boyfriend from San Diego and coming up rather short of exotic exciting things to do in, erm, Delaware. My step-mom suggested Winterthur, which I’d never even heard of before, but decided it was worth a shot. Paul and I somehow managed to find it (my sense of direction is, at best, terrible) and wandered around until we stumbled upon the Enchanted Woods. Enchanting it was indeed! I remember skipping hand in hand over a cute little bridge, walking in circles over the faerie ring, and spying a cute little thatched building. That afternoon perfectly captured the bittersweet emotions of drifting away from your first love and leaving home for the unknown future.

Me on the bridge
Faerie Ring

11 years passed in a flurry of world travel, adventure, and lastly, a deep depression caused by chronic migraine. At the behest of my parents, I found myself moving back to Delaware. Never in a million years would I have thought that I’d come back to my hometown, but it turned out to be one of the best decisions that I’ve made in my adult life. I was leaving St. Louis behind after 4 long years, and I wasn’t sure of my decision. My brain was riddled with migraine pain, I was moving in with my parents, and I had no job. Things weren’t looking super bright at the time. Happily, my dearest and closest friend in St. Louis, Lizzie, volunteered to make the 17 hour drive with me and to stay for a few days. It may seem silly, but having my favorite part of St. Louis with me for the transition made it so much more bearable! Of course, upon our arrival, I was determined to show my latest guest the unknown delights of Delaware! And still, I floundered until my step-mom reminded me of Winterthur for the second time. And so I returned to the Enchanted Woods, faced yet again with saying goodbye to one of the people closest to my heart while saying hello to upcoming untold adventures.

Lizzie in the Enchanted Woods

While I don’t think this one small painting can capture the magic of those two days, or the profound sense of nostalgia that it inspires in me, I hope that it conjures up in my viewer their own memories of this place if they have any, or hints at the magic that lays in wait in what surely is an enchanted wood. 

An Enchanted Pathway


Monday, April 11, 2016

An Artist’s Observations on How to Prepare for a TV Interview

For the first time ever, I made a TV appearance this past Friday, April 6 from 4-5pm! Linwood Jackson, of The Urban Compass on Comcast Channel 28, interviewed me about my recent coloring book, A Portrait of Delaware: A Coloring Book Meet and Greet. About the show: it is a great local program that features a host of interesting characters! Musicians and performers, local politicians, artists, varying local businesses – you name ‘em, Linwood has interviewed them! For this week’s show, he had 2 musicians, although I unfortunately only caught the name of one, Skip Boardley Jr. Both were amazing! He also interviewed Kathy McGuiness, Democratic candidate for Lieutenant Governor, and Stacy Shamburger with Lily Elite AffairsLLC. Here is a pic of us looking quite dapper before the show!

Kathy McGuiness, Linwood Jackson, Maia Palmer, Stacy Shamburger
What’s it like to be interviewed for TV, you ask? Let me tell you. NERVE-RACKING! I was so stressed about it, that the day afterwards, I actually got a migraine from the whole experience. (I still have said migraine, in fact.) Was it REALLY worth it, you ask? YES! I would do it again in a heartbeat!

I probably should have read a bit more on how to prepare for such an interview, but I did at least read 2 articles about the most important factor – what to wear, of course! Unfortunately, I came to the conclusion that you should wear a ton of makeup (which causes migraines) and solid blue. Black? Bad. White? Also bad. Red? Nope. Stripes, patterns, checks? Obviously not. Seriously. That removed pretty much my entire wardrobe. One of the silliest lines I read was, “Dress in a simple, boring manner, unless you are a fashion designer.” Right-o. Wear blue, be boring. Got it. Instead, I wore black, red, and stripes. Oops. I also had hideously short, bitten, raggedy nail-bits, rather than the suggested beautiful manicure…

That said, I did straighten my hair AND iron my shirt, so for me, who likes to roll out of bed approximately half an hour before I leave the house, I was looking pretty good! Per my friend Susan’s instructions, I also made sure to hit up the “Power Pose” several times that morning and right before the interview. It’s legit, people! If Wonder Woman does it, that’s enough to convince me. Not only was I prepared to nail this interview, I could have taken on an evil villain at the same time!

In addition to considering my wardrobe and powering up, I prepped by making notes and considering my verbal strategy. While on the phone with Jackson the night before, he asked me a few questions, such as “How long have you been making coloring books” and “What inspired you to do this project?” so at least I had a general idea of what I’d be talking about. I even whipped out some of my notes from grad school, which was the last time I really had to do any public speaking. (They were mostly useless). I practiced a few times in front of the mirror, and then tortured my step-mom the following morning by practicing a few more times with her. Even so, it was hard not to be caught up in the moment during the interview! My natural tendency to wax enthusiastic took over for most of my answers, which means I gestured a lot and was far from concise. One thing I’m certain of, however, is that the viewers will understand my passion for this project and how much I love meeting and talking with people for the sake of art!

In terms of what the experience was like, it was a blast! I got to sit in the “green room” for a bit – note: it was NOT actually green. I also got to sit on the sidelines while Linwood interviewed some of his other guests. It was interesting watching the interplay between the cameraman and Linwood; a lot of communication was necessary even for just a short segment. Of course, when it was my turn for the interview, I was so wound up that I was mostly oblivious to what was happening around me. There were 3 different cameras – all of which I ignored and tried to copy the guest in front of me and focus on Linwood. Was this the correct strategy? Frankly, I have no idea. At the end of the interview, I was directed to look straight at the camera – which I eventually did, but to be honest, it took me a bit (and a lot of gesturing on the poor cameraman’s part!) for me to finally catch on and fix my attention to the correct camera. Note to self: be more spatially aware!

All in all, it was an exciting experience! Thanks so much to Linwood for thinking of me, and also my friend Julie for showing him my coloring book! Strangely, the whole thing came about from salsa dancing at Delaware Park, which is how I know both Julie and Linwood. And of course, thanks to everyone who participated in the coloring book and I hope you enjoy the show!


Sunday, April 10, 2016

Delaware Coloring Book is a Success!

A Portrait of Delaware, A Coloring Book Meet and Greet has been an official success! Over 100 artists participated in the Delaware Fun-A-Day exhibit, and I am delighted that my coloring book was part of the show. The book was so popular, I have decided to make it available for purchase online! You can buy it at Gallerymaia, or you can find them at The Delaware Contemporary gift shop or The Oddporium.

For the opening event, I set up a table for people to peruse through my book, and also a little "coloring nook" for visitors to color in their own page and hang it up for display. Adults and kids alike were engrossed in the activity, and I was especially pleased that so many of my 'models' for the book came to the exhibit! Below are more of the pages and photos from the actual event. 

One of my favorite aspects of this project was the element of interaction for both the people IN the book, and the people who colored in the book! I loved talking to strangers in some of my favorite stores and getting to learn about them! It was definitely a little nerveracking to go up to random people and convince them that I was a legit artist and that I wanted to draw their portraits. I think most people like the attention - who doesn't like to know that they have been noticed? We all feel good when someone says, "You are interesting and important!"  I like to think that this project brought a little bit of joy to my participants :)

Admittedly, probably 50% of the people in the book I know through salsa dancing - who knew there was such a strong dance community in northern Delaware?! I also included several family members, and even one of my amazing freshman art students! Now that I'm done, I feel like this could be just the beginning. There are so many interesting people in Delaware - everyone has a story! Will YOU be in it?!?! Feel free to contact me if you'd like to be included! I'm thinking I might add some location drawings and maybe some fun trivia games (coloring book style of course) for the next one.

And lastly, a GIANT thanks to everyone who participated! I couldn't have done it without you! And also a shout-out to all the dedicated volunteers with Delaware Fun-A-Day who organized the event, and The Delaware Contemporary for hosting it! I can't wait for next year :)


Saturday, April 9, 2016

Bottles in Bangkok, Revisiting an Oil Painting from the Past

I started this work during my first semester of grad school in 2009. I had gotten into the MFA program with a series of fairly realistic paintings about my experiences living in Japan. I knew I was interested in the stories behind my experiences, but I couldn't quite verbalize or justify why I wanted to paint this at the time. Because of that, despite what I now see as plenty of potential in many of the works I started, I abandoned the project. That said, by moving forward to new projects, I discovered digital art and I've never looked backwards!

Meanwhile, this painting had been sitting around gathering dust for over 5 years, and I decided it was finally time to finish it! The painting is based off of an encounter with a bottle vendor in Bangkok. I was visiting Bangkok with my roommate while I lived in Japan. We took a lot of tours while we were there - but they were all unfortunately in Japanese so I have no idea what they were telling us!

After leaving a gorgeous temple on a dreary rainy day, I saw a woman slouched on the side of the road on top of her water cart. I fell in love with the image! There was something so melancholy about her semi-reposed figure in contrast with the blue bottles that she was selling - I knew it had to be painted!

Here is what it originally looked like before I started my renewed attack. I liked the mood of the painting, and digging into my memory, I remember thinking that I wanted it to be mostly black and white with the water bottles standing out in blue. I also knew that I wanted to keep the "drippy" background - to imply rain without actually painting it.

Bottles in Bangkok - Original Painting
Original painting
Before I started reworking it, I wanted to check it's accuracy - I usually use Photoshop to help with this. I took a pic of the painting, then opened a file with my painting on the bottom layer, the reference photo on top, and then I used my drawing tablet to make an accurate trace of the figure based on the photo.  
Bottles in Bangkok - Photo Trace
Photo with linear overlay

I then turned the photo "off" so that I could see my line work on top of my painting. I assessed where my painting was off and using Photoshop to guide me, I set about correcting my errors and deepening my values. Though I have to say, I didn't have a whole lot to fix in terms of placement!

Painting with linear overlay

Here is my initial "repaint." The water bottles definitely still needed some work, and I also wanted to emphasis the rainy quality, so next I focused mainly on those two areas. After adding more detail and deeper blues to the bottles, it seemed like I needed to add a tint of blue in other areas of the painting to tie it in. To finish it off, I added some radiating circles to imply the raindrops hitting the ground and added a touch of blue to unify the painting.
Corrected Proportions

Working with a limited palette was a great exercise - it really helped me focus on accuracy and value. I hope you enjoyed learning about my process and seeing my artwork. Here is the final product!
Bottles in Bangkok, oil on canvas, 24" x 36"

Welcome!

Welcome to my new blog on all things artsy! I'll be sharing my own personal adventures in art making as well as my successes and failures in the art classroom. I find that my own art-making is closely linked to my work as an art teacher. I am so frequently inspired by my students work and I hope that you are too! Please enjoy, and feel free to comment every now and again.